New Features in version 3.1
There are a lot of new features in WinSched 3.1 that will make the job of scheduling significantly easier. The following are just a few of the new features included in this latest release. |
 |
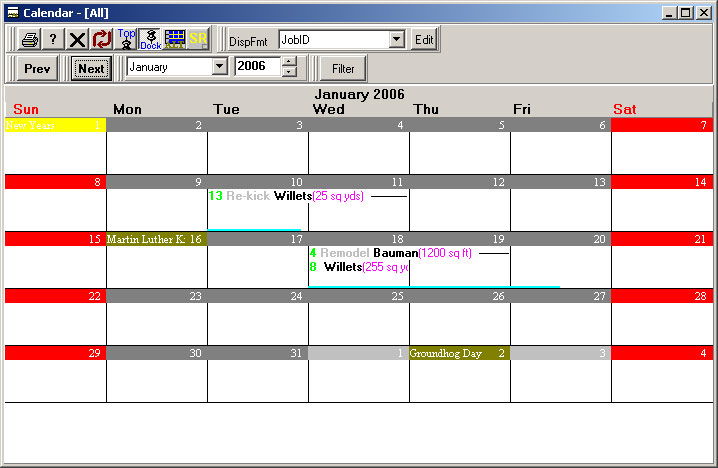
New Calendar ViewAn improved calendar view makes it much easier to view your schedules in this familiar format. This view is not as efficient to schedule with as the standard schedule board, but it is a much more familiar format.
|
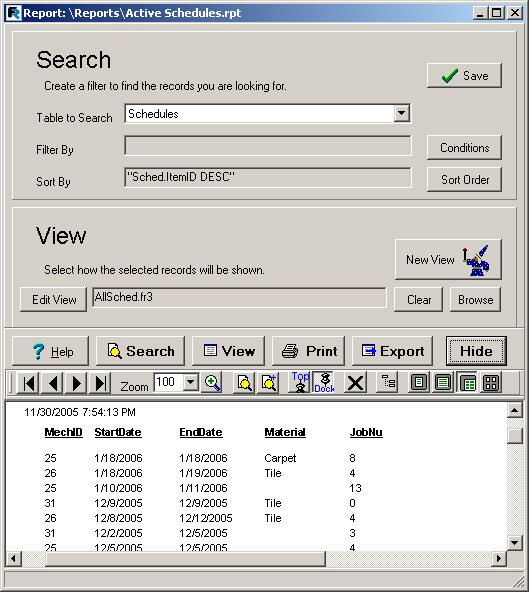
Report Results WindowAn improved results window is much more efficient to use. The drill down feature allows you to open or edit schedules directly from your reports. Search for selected text in your finished report to quickly find schedules you are looking for.
With the report designer built in, simply press the edit button to switch to design mode. Make changes just for the selected report or save them for next time.
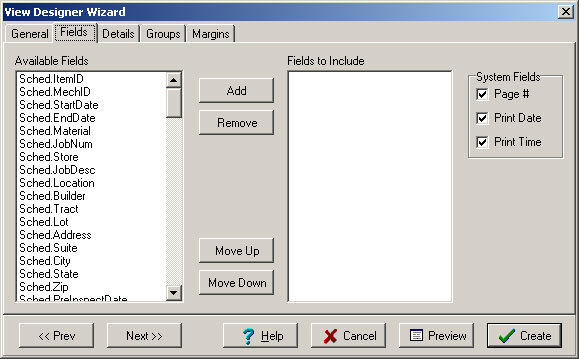
You can now create reports for Schedule, Requests, History or Mechanics tables. Each of these tables can be filtered by a list of conditions. These conditions reduce the number of records to just those you are looking for. The order of how your report is sorted can also be selected by setting the Sort Order. Specifying a sort order also gives you the ability to Group records together in the report view (for example, showing all schedules for each mechanic in one group, or schedules grouped by builder). This list of filtered and sorted records can be either displayed in a standard data grid or a formated report view. New views can be created using the View Designer Wizard.
There are two standard types of reports: Tabular - One column for each field. This is format that fits the most information on a page and is usually the easiest to view. Form - One page per record. This format is commonly used in a Master/Detail report. Displaying the schedule similar to what you see on an edit form on the top of a page and the selected details on the bottom would be a typical use for this type of report.
You can quickly select which fields you want to see on your report and press the Preview button to see what the report looks like. When you are happy with the report view, press the create button to make your settings permanent.
|
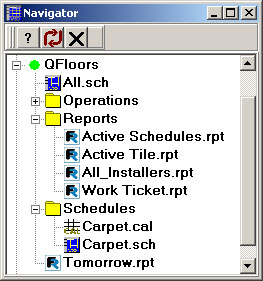
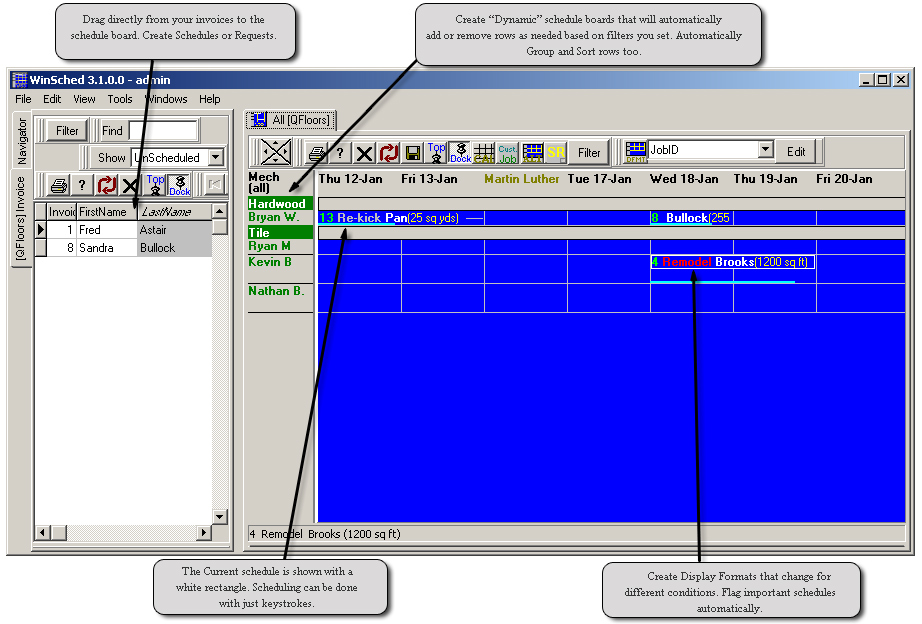
A new navigator replaces the Reports and Schedules windows and gives you the ability to create folders, drag objects around and organize them how you want. Schedules, Reports, Calendars and Custom Tables all share this common view. |
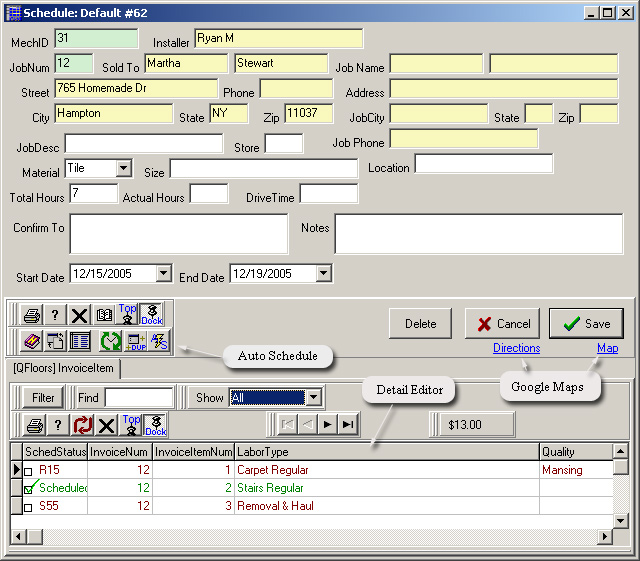
Edit Form with Detail EditorThe Edit Form now has a combined Detail Editor so you can select details and enter schedule information all at one time. From the drop of an invoice on the Schedule Board will allow you to select the Invoice Items you want to schedule (which calculates a total dollar amount and adjusts the TotHours field.
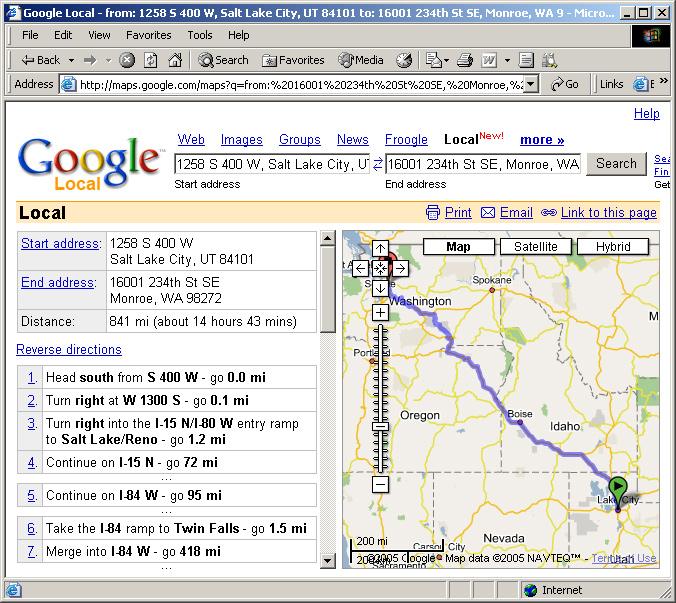
In the picture above, the middle detail line is attached to this schedule, the top line is attached to Request #15 and the bottom is attached to Schedule 55. Details can be shown for All (All for this job), Unscheduled (All for this job that are not yet scheduled) or Scheduled (All for this job that are attached to this schedule). A simple click on the Directions or Map links will open a new web page containing a Google Map for the address in the edit form.
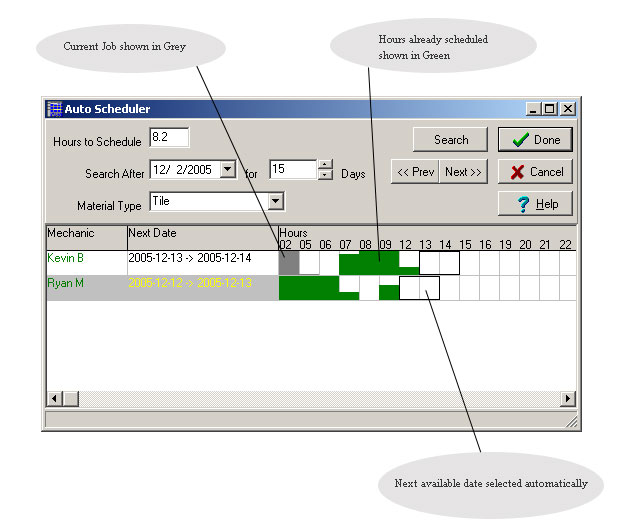
Once you have selected your detail lines and the TotHours represents how long the schedule should take (in man-hours) you can search for an available slot using the Auto Schedule features (below). |
If scheduling rules are used, and your schedule is crowded, it is sometimes hard to find a slot for your new schedule. The Auto Scheduler makes this easy. When you press the AutoSchedule button on the edit form, the Auto Schedule will be displayed with Hours to Schedule, Search After Date and Material Type preloaded. The Auto Scheduler will then list each of the installers whos assigned Material matches the Material type you are scheduling. For each of the installers, a graph will be shown displaying the jobs scheduled for the selected time period. A Next Date will also be shown indicating the earliest date each installer is available for the necessary hours. The first installer with the earliest date will automatically be selected. Pressing the Done button will insert the selected Start and End Dates in the schedule edit form. |
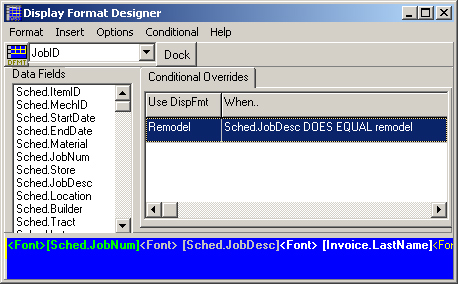
Display Format DesignerA more powerful Display Format Designer gives you the ability to set different display formats conditionally. This makes it easy to use a different display format for different stages of the schedule (waiting for material, on hold, completed, etc.).
|